What Is the .xedant Folder?
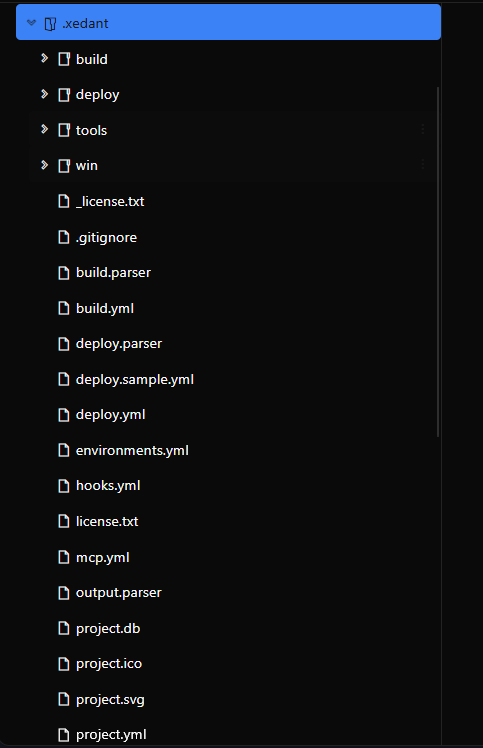
The .xedant/ folder is the configuration and data directory for Xedant Code. It’s created automatically in your project root the first time Xedant Code runs, and it stores everything the application needs: build definitions, deploy settings, environment presets, database files, runtime logs, and more.
You rarely need to edit these files yourself. The AI model reads .xedant/README.md to understand the format of every configuration file, so you can just ask it to make changes — “add a build that runs my linter,” “set up a Docker deploy to staging,” “create a new environment for GPT-4” — and the model handles the YAML syntax and file structure correctly.
This page explains what each file and folder does, so you know what’s in there and can make informed decisions when the AI suggests changes.
project.yml
This is your project’s identity card. It stores the project name, an optional icon, and an optional link to open the project in VS Code’s web editor.
project:
  name: "MyProject"           # Auto-detected from your git remote URL
  icon: ".xedant/project.svg" # Optional: project icon shown in the UI
  code: "https://..."         # Optional: VS Code Web URL
The name field is automatically set from your git remote on first run, so you usually don’t need to touch it. The icon field can point to either a .svg or .ico file. The code field is used when you want a button in the UI that opens your project directly in VS Code.
build.yml
This is where you define your automated build validators — the commands that check whether the AI’s code changes are correct. Despite the name, builds don’t have to compile anything. Any command that produces structured output (errors and warnings) works as a build: compilers, linters, type checkers, test runners, security scanners, or custom validation scripts.
Builds support two types:
- Command builds run a shell command and parse its output for errors and warnings
- Prompt builds create a new AI chat session with a validation prompt — useful for code reviews or checks that require AI reasoning
build:
  compile:
    path: "server/"
    command: "dotnet build"
    delay: 3
    timeout: 60
    watch: "*.cs"
    ignore: []
    replacements: []
    stopStrings: []
    display: always
    autofix: always
    startSound: ""
    endSound: ""
    soundVolume: 1.0

  ai-review:
    watch: chat
    prompt: "/verify Review the recent code changes. Read the transcript at {chat} and report any problems."
    chatTitle: "Code Review"
    delay: 5
    timeout: 120
Key properties:
- command — The shell command to execute (command builds only)
- prompt — The validation prompt sent to a new AI chat (prompt builds only)
- watch — File glob patterns (
*.ts *.js), other build names (compile), orchatto trigger on user chat completion - delay — Seconds to wait before triggering after detecting changes (default: 3)
- timeout — Maximum execution time in seconds (default: 60)
- display — When to show in the Build Panel:
always,errors,warnings, ornever - autofix — When to participate in AutoFix:
always,errors,warnings, ornever - ignore — Regex patterns to suppress from error/warning output
- replacements — Find/replace pairs to remap paths (useful when builds run in Docker or temp directories)
- stopStrings — Strings that abort the build immediately when detected in output
- startSound / endSound / soundVolume — Optional audio feedback when the build starts or finishes
Builds can chain together — one build can watch another, so it runs only after the parent completes successfully. This lets you create ordered pipelines like compile → test → deploy.
Output is stored in .xedant/build/ with three files per task: {name}.output.txt (full output), {name}.errors.txt (parsed errors), and {name}.warnings.txt (parsed warnings).
Learn more about builds, AutoFix, and the Build Panel →
deploy.yml
This file defines your deployment targets — how your application gets started after builds pass. It supports two methods: debug for local development and docker for remote container deployments.
# Local development — runs directly on your machine
deploy:
  my-app:
    method: "debug"
    path: "./server"
    command: "dotnet run"
    watch: "compile"        # Restarts after this build succeeds
    shallowCopy: true        # Only copy changed files (faster)
    url: "https://..."        # Optional: clickable link in UI
    startSound: ""
    endSound: ""

# Remote deployment — pushes to a Docker container via SSH
deploy:
  production:
    method: "docker"
    host: "server.com"
    username: "deploy"
    sshKeyPath: "~/.ssh/key"
    imageName: "app:latest"
    containerName: "myapp"
    dockerfilePath: "./Dockerfile"
    environmentVariables:
      - PORT=3000
    portMappings:
      "8080": "3000"
The debug method runs your application on the local machine — ideal for development. It can watch builds and auto-restart when they succeed, uses shallow copying for faster restarts, and supports environment variables.
The docker method pushes your code to a remote server via SSH, builds a Docker image, and manages the container — ideal for staging and production. It supports port mappings, volume mappings, Docker networks, health checks, and configurable build args.
Deploy runtime output is stored in .xedant/deploy/{name}.log. Both methods support optional audio feedback (startSound, endSound, soundVolume).
Learn more about deploy controls, the Deploy Panel, and deployment methods →
environments.yml
This file stores environment variable presets for different AI models. Each environment defines a set of variables that get applied when you select that model in the UI — things like the model identifier, context length, and pricing.
environments:
  claude-sonnet:
    variables:
      - ANTHROPIC_MODEL=claude-sonnet-4-20250514
      - MODEL_CONTEXT_LENGTH=200000
      - MODEL_INPUT_PRICE=3.0
      - MODEL_OUTPUT_PRICE=15.0

  claude-sonnet-fast:
    variables:
      - ANTHROPIC_MODEL=claude-sonnet-4-20250514
      - MODEL_CONTEXT_LENGTH=200000
      - MODEL_INPUT_PRICE=3.0
      - MODEL_OUTPUT_PRICE=15.0
Environments support hierarchical inheritance. A child environment inherits all variables from its parent. For example, if you have environments named glm, glm-5, and glm-5-turbo, the turbo variant inherits from both glm-5 and glm, so you only need to define the variables that change at each level.
Values prefixed with $ reference system environment variables: $MY_API_KEY will be replaced with the value of the MY_API_KEY environment variable from your system.
Learn more about creating and switching environments →
mcp.yml
This file configures MCP (Model Context Protocol) servers — external tools that extend what the AI model can do. MCP servers provide additional capabilities like web browsing, database queries, code search, and more.
version: "1.0"
servers:
  filesystem:
    enabled: true
    type: "stdio"
    command: "npx"
    args:
      - "-y"
      - "@modelcontextprotocol/server-filesystem"
      - "/project"
    env:
      NODE_ENV: "production"
Each server can use one of three transport types:
- stdio — Runs as a local process communicating over standard input/output
- http — Connects to a remote server via HTTP
- sse — Connects via Server-Sent Events
This file automatically syncs with Claude Code’s own MCP configuration on startup and whenever changes are detected, so you can manage servers from either the Xedant Code settings UI or directly in Claude Code’s config, and they’ll stay in sync.
Learn more about adding and managing MCP servers →
hooks.yml
This file configures Claude Code hooks — rules that intercept what the AI does before it happens. Hooks let you deny dangerous operations or run custom commands at specific points in the AI’s execution.
PreToolUse:
  Bash:
    - type: "deny"
      pattern: "rm -rf /"
      message: "Dangerous command blocked"
    - type: "execute"
      pattern: "git push"
      command: "echo 'Push detected'"
      regex: false
There are two hook event types:
- PreToolUse — Fires before the AI uses any tool (Bash, file editing, etc.). You can
denymatching operations (block them and show a message) orexecutea shell command when a pattern matches - UserPromptSubmit — Fires when you submit a prompt, allowing pre-processing
The hooks.yml file auto-generates .claude/settings.local.json — the actual hooks configuration that Claude Code reads. This means you only need to maintain hooks.yml, and the corresponding Claude Code settings file stays up to date automatically.
Learn more about deny rules, execute commands, and controlling tool usage →
skills.yml
This file controls which skills are active in your project and what color they appear as in the UI. Skills are reusable instruction sets that change how the AI behaves for specific tasks.
skills:
  version: "1.0"
  activated:
    my-skill:
      enabled: true
      color: "#3b82f6"
    another-skill:
      enabled: false
Each skill entry has an enabled toggle and an optional color for UI display. Skills that are disabled won’t appear in the skills selector and won’t affect the AI’s behavior.
Learn more about using, creating, and editing skills →
providers.yml
This file stores AI provider definitions — pre-configured templates that define how to connect to different AI services. Each provider specifies the API endpoint, model names, and environment variable templates needed to authenticate.
providers:
  anthropic:
    name: "Anthropic"
    environments:
      default:
        variables:
          - API_BASE_URL=https://api.anthropic.com
          - MODEL_ID=claude-sonnet-4-20250514
          - API_KEY_VAR=ANTHROPIC_API_KEY
This file is auto-created from an embedded resource if it’s missing. It includes pre-configured providers for popular services like Anthropic, OpenRouter, and others. You typically don’t need to edit it manually — the AI model uses it to understand how to connect to each provider.
Parser Files
Xedant Code uses three parser files to extract errors and warnings from text output. All three share the same format — a simple rule-based system with [ERROR] and [WARNING] blocks containing regex patterns. The parser files are fully self-documented with inline comments, so you rarely need to edit them manually.
How parsers work
Each parser iterates through output lines, trying to match patterns in order:
- Comment lines starting with
#are ignored (used for documentation) - Single-line patterns — a regex that matches one output line
- Multi-line patterns — wrapped in
{{...}}, matches zero or more consecutive lines (useful for stack traces or indented context)
# TypeScript compilation errors
[ERROR]
.*\.ts.*              # Matches a line containing a .ts file path
Error.*               # Matches a line starting with "Error"
{{^\s+}}              # Matches indented context lines that follow
[/ERROR]
Parsers reload automatically when their files change, so edits take effect immediately.
build.parser
Extracts errors and warnings from build command output. Ships with patterns for C# (MsBuild, CSC), TypeScript, Svelte, Vite, Python (ruff), and ReSharper. Add patterns for any additional tools your project uses.
deploy.parser
Extracts errors and warnings from deployed application runtime output. Handles unhandled exceptions, stack traces, database connection failures, HTTP error codes, and application crashes across different platforms.
output.parser
A catch-all for generic script output — shell errors, Python tracebacks, Node.js exceptions, npm failures, and other common error formats. Used when output doesn’t fit the build or deploy categories.
license.txt
This file stores your application license key as a Base64-encoded JSON string. It has the highest priority of all license sources — it overrides both the --license command-line argument and the XEDANT_CODE_LICENSE environment variable. If this file is present, its contents are used regardless of other configuration.
Learn more about license types, activation, and status →
project.db
This is the application database that stores all of Xedant Code’s persistent data — chats, messages, settings, analytics, and more. By default, it uses SQLite, which stores everything in a single file with no external database server required.
Three files may appear:
project.db— The main database fileproject.db-wal— Write-Ahead Log (WAL mode for better concurrent performance)project.db-shm— Shared memory file for WAL mode
The database is auto-created on first run and schema migrations run automatically on startup, so you never need to manage it manually. If you prefer PostgreSQL instead of SQLite, set the XEDANT_CODE_DATABASE environment variable to a PostgreSQL connection string and the database will be created there instead.
Directories
build/
Stores build output logs. Auto-created when builds run. Each build task produces three files: {name}.output.txt (full command output), {name}.errors.txt (parsed errors), and {name}.warnings.txt (parsed warnings). You can view these in the Build Panel without opening the files directly.
deploy/
Stores deploy runtime output and client-side debug logs. Auto-created when deploys run. Each deployment produces {name}.log with the application’s runtime output. Client debug logs are stored as {domain}.log (auto-truncated at 100MB).
sounds/
Optional directory for custom notification sounds. Place .mp3 files here to override built-in sounds or add new ones. Built-in sound names are: message, notification, complete, error, commit, and deploy.
The server checks .xedant/sounds/ first, then falls back to built-in defaults. To restore a built-in sound, simply remove your custom file. The startSound and endSound properties in build.yml and deploy.yml can reference any built-in name or custom sound placed in this directory.
tools/
Optional directory for utility scripts. Place any helper scripts here that you want to use alongside your project — diagnostic tools, deployment helpers, or custom automation. This directory is not auto-created.
Auto-Created Files
The following files are created automatically on first run if they don’t exist. You can safely delete any of them — they’ll be regenerated from embedded defaults the next time Xedant Code starts:
project.yml— Project metadata (name auto-detected from git remote).gitignore— Default ignore patterns for the.xedant/directoryoutput.parser— Generic script output parser rulesbuild.parser— Build output parser rulesdeploy.parser— Deploy runtime parser rulesproviders.yml— AI provider definitions and templatesREADME.md— Format documentation for all config files (read by the AI model)
Configuration files (build.yml, deploy.yml, project.yml, hooks.yml, mcp.yml, skills.yml, environments.yml) are also automatically validated whenever you save them. Validation results appear in the Build Panel alongside your regular builds — errors in red, warnings in yellow — with references to the relevant section in README.md so you can look up the correct format.