build is just a descriptive name for any action that runs automatically on certain events. Such an action doesn’t have to produce executable files — the only requirement is that it outputs logs which can be automatically parsed for errors and warnings.
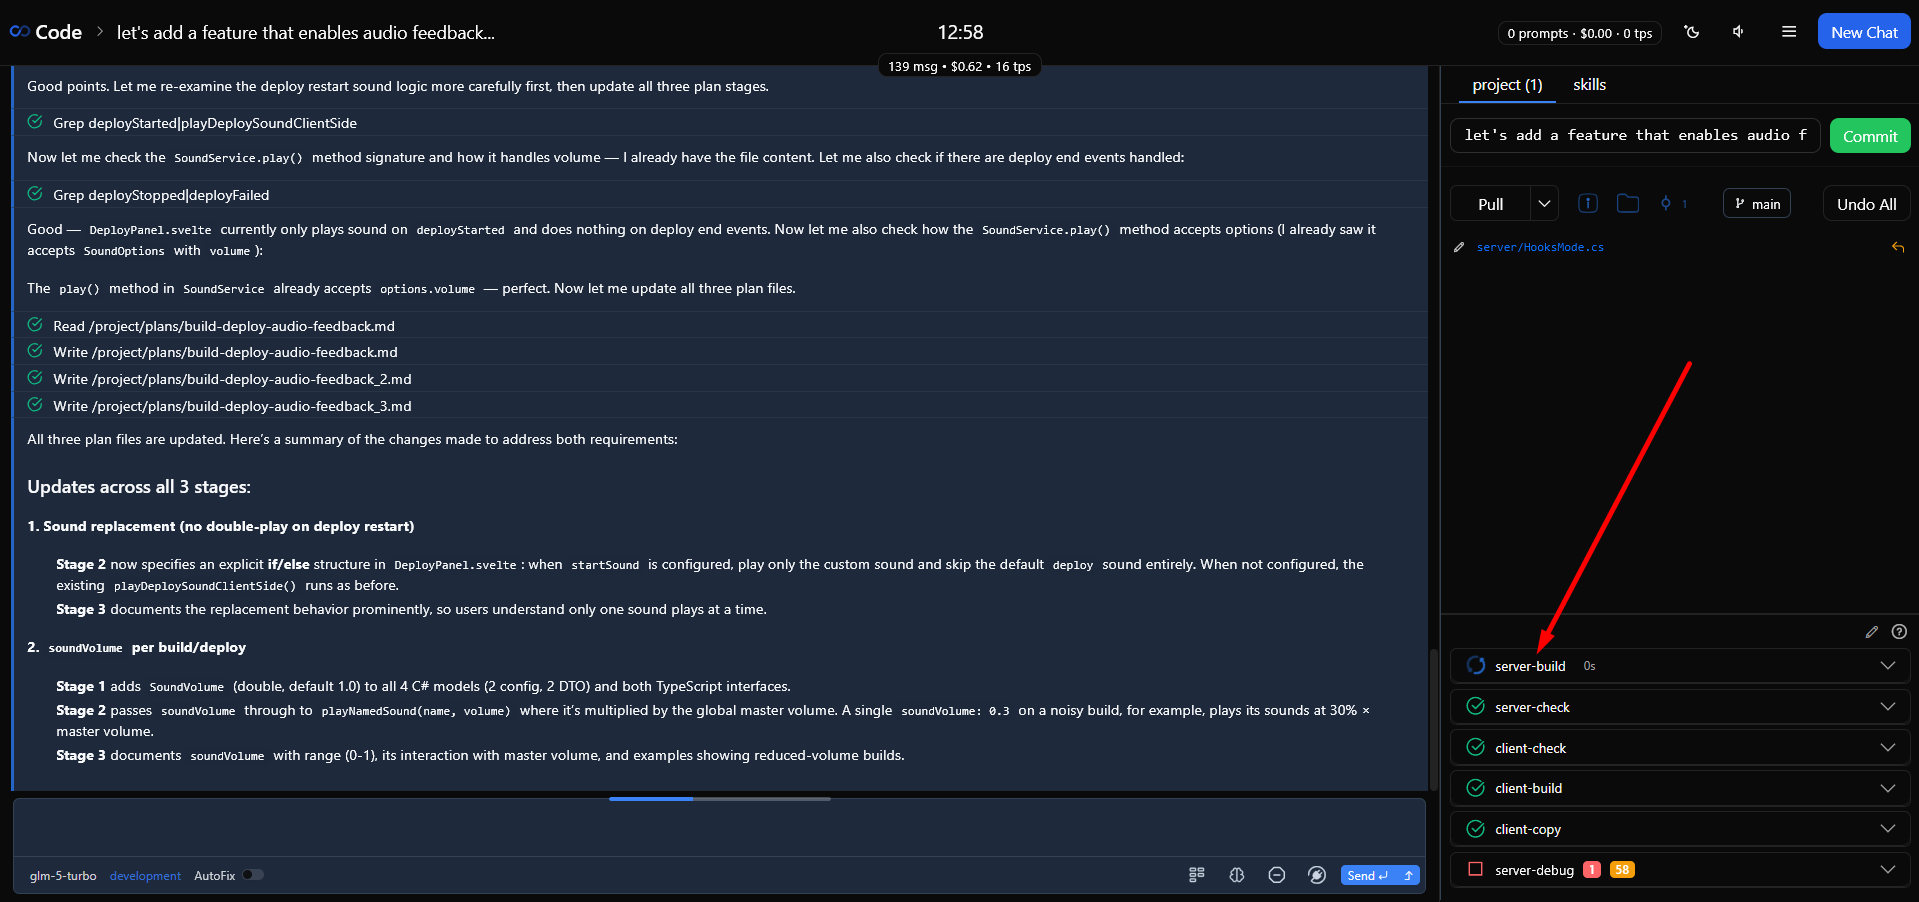
This gives you near-unlimited flexibility for automatic validation of model output, project edits, and skills. Even where manual review is needed, builds still help: you can have the model prepare a list of “hot spots” to check in advance, or a detailed report with instructions for manual review.
Always look for ways to automate and extend validation — it genuinely saves your time in the long run. You don’t even need to invent anything: just ask the model to do it for you, using .xedant/README.md as a reference.
Automated build validation is the core of Xedant Agent’s validation pipeline. Instead of waiting for the model to call npm test or dotnet build on its own, builds run on every file change the AI makes in the right folders: code is compiled, checked by linters and types, and tested — all without your involvement. Raw build output is parsed into structured errors and warnings (using flexible rules that are easy to update), which then go back into the chat at the end through AutoFix, while the build panel lets you review them manually. You don’t have to wait for the chat to end to see errors and send your feedback — that’s what the message queue is for: just send your feedback and go about your business, and it will be delivered to the chat at the end.
Because of this, chats finish faster, costs go down, and post-chat validation speeds up: the rebuilt application can be fully deployed by the time the model writes its final summary. It is especially convenient when you have several builds and linters — they run in parallel instead of the model running them one by one.
There is less visual noise too — you see the model doing your tasks, not running linters and builders over and over. To keep the model from duplicating this work, add a rule to CLAUDE.md like “never build or lint manually”, and hooks will stop it from forgetting the rule.
Build Configuration
Builds are configured in .xedant/build.yml. Each build defines a command, the events that trigger it, and optional settings: delay, timeout, and path normalization. There are two types: command builds simply run a shell command, and prompt builds are AI-driven validation (covered in the Automated Prompt Builds guide).
build:
  task-name:
    path: "src/"              # Working directory for the command
    command: "npm run check"  # Shell command to execute
    delay: 3                 # Seconds to wait before starting (default: 3)
    timeout: 60              # Maximum execution time in seconds (default: 60)
    watch: "*.ts *.js"      # File wildcards or build names (space or comma separated), or `chat` to watch for the current chat completion
    commandOutput: ""         # Path to an additional output file (optional)
    ignore: []                # Regex patterns to filter out of errors/warnings
    replacements:             # Find/replace in output paths
      - find: "/tmp/build"
        replace: "/project"
    stopStrings: []           # Strings that abort the build immediately
    display: always           # UI visibility: always, errors, warnings, never
    autofix: always           # AutoFix participation: always, errors, warnings, never
    startSound: ""            # Sound when the build starts (built-in or custom)
    endSound: ""              # Sound when the build finishes (built-in or custom)
    soundVolume: 1.0          # Volume 0-1 for build sounds
Build Triggers
The watch field defines which event triggers the build. There are three options:
- File wildcards — glob patterns like
*.ts *.svelte. The build watches thepathfolder and, when matching files change in it, runs the command after the configured delay; - Parent build names — a reference to another build by name: this build runs only after the parent finishes successfully, which is how ordered pipelines are built;
chat— a special trigger that fires when the user’s chat session completes. Works for all build types and deploys.
Each build watches exactly one type of event — files, parent builds, or chat completion. If you need a build to fire on a combination of events, duplicate it with different watch values: this way each copy is easier to debug and control. To avoid duplication, use a parent-child scheme: create several lightweight no-op parent builds, each watching its own event, and a single child build watching all of them — it fires when any parent completes and runs the command once. Hide the parent builds from the panel with display: never.
If several files change during the delay, the timer resets. And if files change while a build is running, the current build is cancelled and restarted with the new changes.
⚠️ watch: chat automatically runs builds at the end of any chat initiated by the user (not by a subagent). Use it for heavy validation that should not re-run on every file change: prompt builds, security audits, expensive analysis — anything that takes too long to run on every file update.
Such a build runs only when all higher-level pipelines are finished: all queued user messages are processed first (they always enter the chat before anything else), and the AutoFix pipeline has fully completed with no remaining errors or warnings. There is no point running heavy operations in a “dirty” state — those problems will be fixed by your feedback or AutoFix anyway.
Display and AutoFix Control
Each build has two fields that control its behavior in the UI and with AutoFix:
- display — when the build appears in the build panel:
always(default),errors(only when there are errors),warnings(when there are errors or warnings), ornever(hidden); - autofix — whether this build’s errors are sent to the AI for fixing:
always(default),errors,warnings, ornever. Turn it off (never) for builds whose output you want to review manually — for example, prompt builds, security tests, or high-level analysis.
You can control the AutoFix pipeline on the fly with the toggle below the chat message input. Turn it off and build errors and warnings stop going into the chat until you turn it back on. This is handy when you have stopped a chat halfway and don’t want AutoFix trying to fix a project state you know is unfinished.
Build Chaining
Builds can be chained together, with one watching another instead of files. The system resolves the dependencies itself and runs builds in the correct order:
build:
  compile:
    command: "dotnet build"
    watch: "*.cs"

  inspect:
    command: "jb inspectcode Code.sln -f=Xml --verbosity=ERROR -o=bin/inspectcode.xml"
    commandOutput: "/tmp/code/builds/inspect/bin/inspectcode.xml"
    watch: compile        # Runs only after successful compilation

  test:
    command: "dotnet test --no-build"
    watch: compile        # Runs only after successful compilation
The Build Parser
Each build’s output is saved in .xedant/build/ as three files: {task-name}.output.txt (full command output), {task-name}.errors.txt (parsed errors), and {task-name}.warnings.txt (parsed warnings).
The parser turns raw command output into structured errors and warnings. It reads the .xedant/build.parser file, where rules are grouped into [ERROR]/[/ERROR] and [WARNING]/[/WARNING] blocks. The parser reloads itself when the file changes — no restart needed.
⚠️ Don’t edit parser files manually — ask the AI model to do it. The easiest way: select unrecognized text in the build output (on the build panel or in the output dialog) and click the floating Fix build.parser button — the model receives the selected text with a ready-made prompt and updates build.parser. Alternatively, use .xedant/README.md as a reference in the chat.
Parser Format
- Comment lines starting with
#are ignored; - Single-line patterns — a regular expression that must match one output line exactly;
- Multi-line patterns — wrapped in
{{...}}, they capture zero or more consecutive lines following the inner regular expression.
# TypeScript errors with indented context
[ERROR]
.*\.ts.*              # Matches a line containing a .ts file path
Error.*               # Matches a line containing "Error"
{{^\s+}}              # Matches zero or more lines starting with whitespace
[/ERROR]

# C# compiler errors (MsBuild format)
[ERROR]
\[MsBuild\].*\(\d+,\d+\)->\(\d+,\d+\)\s+CS\d+\:.*
[/ERROR]

# Python ruff errors
[ERROR]
[A-Z]\d+\s+(\[\*\]\s+)?.*
\s*-->.*
{{^\s+.*|\d+\s+\|.*}}
[/ERROR]

# Warnings
[WARNING]
\(\d+,\d+\): warning
[/WARNING]
The parser works sequentially: at each output line it walks through the blocks in order and applies their patterns. When all patterns of a block match in a row, those lines are extracted as one error and the parser moves on. Earlier blocks take priority — once a match is found, later blocks are skipped for those lines.
Path Replacements
Builds often run in temporary folders, so the paths in errors don’t match your actual project files. The replacements field maps them back:
build:
  client-build:
    path: "client/"
    command: "npm run build"
    watch: "*.ts *.svelte"
    replacements:
      - find: "/tmp/code/builds/client-build"
        replace: "/project/client"
Replacements are applied before parsing, so error locations point to the correct files in your project.
Config Validation
Xedant Agent automatically validates all .xedant/ configuration files on every save. There are thirteen checks, each responsible for its own file:
build.yml— YAML syntax, requirescommandorprompt, warns about unknown properties;deploy.yml— YAML syntax, warns about unknown properties;project.yml— YAML syntax, requiresname, warns about unknown properties;hooks.yml— YAML syntax, warns about unknown event types and properties;mcp.yml— YAML syntax, warns about unknown keys and server properties;skills.yml— YAML syntax, warns ifenabledis missing;models.yml— YAML syntax, warns about unknown properties;providers.yml— YAML syntax, warns about unknown provider and environment properties;telegram.yml— YAML syntax, validates tags and nicknames, warns about unknown properties;tasks.yml— YAML syntax, warns about unknown keys and invalid task settings;bots.yml— YAML syntax, warns about unknown keys and invalid bot settings;miniagent.yml— YAML syntax, warns about unknown keys inside profiles;*.parser— block pairing ([ERROR]/[/ERROR]), regex validity, patterns outside blocks.
Results appear in the build panel alongside your regular builds. Error messages link to the relevant section in .xedant/README.md so you can find the correct format.
⚠️ Config validation errors and warnings are deliberately excluded from the AutoFix pipeline — to keep them out of existing chats that have nothing to do with Xedant Agent settings. When validation finds a problem, create a fresh chat, click the errors/warnings badge in the build panel, then the Send button on the “Errors” or “Warnings” tab in the output dialog. Or simply copy and paste the output manually. Config builds are hidden from the UI by default to avoid visual noise — you will only see them when there are problems.
The AutoFix Feedback Loop
AutoFix connects builds and the AI model into a self-correcting validation loop. When it is on, the system polls builds at a configurable interval, checks for errors and warnings, and injects them into the chat as messages for the model to fix. For details on behavior, limitations, and manual error submission, see the AutoFix page.
- Idle-only operation — errors are injected only when there is no active AI session, avoiding conflicts;
- Dependency awareness — AutoFix waits for all parent builds to finish before processing a child build’s errors;
- Error priority — errors are sent first; warnings are not touched until all errors are resolved;
- Loop protection — the last 10 messages are compared so it doesn’t get stuck on identical content;
- Build mode — each build’s
autofixfield controls its participation:always,errors,warnings, ornever.
⚠️ Warnings are fixed in a special way — they always arrive with an instruction to fix them, not ignore them. Otherwise models would often skip them as unimportant.
Effective Validation Techniques
Layer several checkpoints for full coverage. Each build catches its own category of problems.
The more automated builds you have, the higher the quality of the result. It directly saves your time and produces better code and UI automatically. Don’t cut corners here — try different ways to extend the automation. Even for manual validation you can make life easier with a semi-automated approach: let prompt builds find potential errors and warnings in advance, then review them instead of re-checking everything from scratch after every update.
- Compiler + linter + type checker + tests — four independent checks, each catching what the others miss. The more builds, the more feedback AutoFix receives;
- Order builds by dependencies — compile first, then lint, then test. Each step runs after the previous one succeeds, without cascading noise;
- Add parser patterns for your tools — if output isn’t parsed, ask the model to extend
build.parser. The parser reloads itself on save; - Use path replacements for containerized builds — if builds run in Docker or temporary folders, map the paths back to the project so error locations stay accurate;
- Hide noisy builds (
display: never) — keep the build panel clean by hiding builds whose output you rarely need to review manually.
For the complete build reference, see Build & Deploy; for the AutoFix feedback loop, see AutoFix; for runtime error monitoring, see Deploy Output Monitoring.